Steps to Set Up Your First Relief Printing Workspace
Posted by Art Supplies Castlemaine on 19th Jun 2026
Starting relief printing at home feels exciting, but if your space isn’t right, it quickly gets messy. A bit of planning in the beginning makes a big difference. A steady setup can help you focus, avoid waste, and get more consistent prints from the start.
Relief printing means cutting into a surface like lino, rolling it with ink, and pressing it onto paper. What stays raised gets printed, while the recessed parts stay blank. It’s more hands-on than digital art, and small things like lighting, layout, and where you dry your prints impact the whole experience.
Keeping relief printing supplies in one place, separated by use, helps reduce delays and mistakes. Less back-and-forth means quicker work time and fewer smudged prints or lost tools. Whether you're working in a spare room, on the kitchen table, or in a shared space, a functional layout helps build flow right from the start.
Choosing the Right Space
You don’t need a big fancy studio to make strong prints. But you do need a reliable area where you can move around comfortably, see clearly, and keep materials under control.
Here's what we look for when setting up a home printing zone,
- Good natural or gap-free lighting so you can catch ink buildup or carving details
- Flat surfaces with enough room to hold your plate, paper, and tools without crowding
- A low-traffic spot where pets or people aren’t touching prints while they dry
Avoid carpet or fabric-covered areas so stray fibres don’t stick to your ink. If you’re working somewhere shared, get in the habit of laying down a cutting mat or clear section of wipeable table cover.
If possible, keep separate space for prepping ink and drying sheets. That saves you from scrambling to make drying room after a print and avoids getting fresh edges smudged. Even a clean rack or clothesline rig helps if bench space is tight.
Must-Have Tools and Supplies for Relief Printing
Starting out doesn’t mean buying everything all at once. The key is to gather reliable tools that last and suit your style of block cutting and inking.
Every beginner relief printer should keep these on hand,
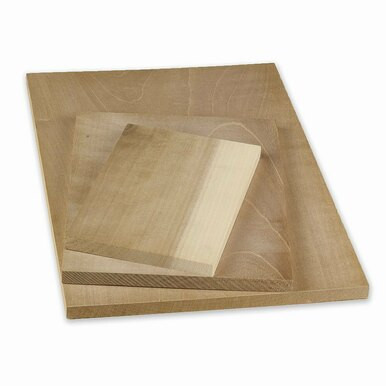
- Lino or softcut plates
- Carving tools, possibly with replaceable blades
- Brayers for rolling out ink evenly
- A baren or hand press to help press the plate down
- Relief printing inks (water or oil-based)
- Firm, smooth printing paper for clean transfers
- Tape and non-slip surfaces to hold work steady
Spare cloths, blotting paper, and a basic spritz bottle help control drying and clean your hands between steps. You don’t need a sink at your station, but having quick access to a spot for washing up keeps your zone using fewer throwaway rags.
Using cut-safe mats under your lino stops tool slips and backs up the plate if you’re working on a soft table. You want a surface that holds steady but won’t wreck your blades.
Setting Up Your Station for Clean Workflow
A tidy space makes it easier to move from one stage of printing to the next without retracing your steps or making errors. You don’t have to section out every centimetre, just set things in a sensible flow.
We usually split our space like this,
- Carving area with mats, wiping cloths, and bins for offcuts
- Inking spot with glass palette, brayer, and gloves
- Pressing area for laying paper and applying pressure
- Drying zone (wall pegs, shelves, or clean cardboard trays)
Smearing ink is frustrating. Keeping used paper towels nearby gives you a place to wipe between pulls and stop fresh ink from ghosting onto clean work.
By keeping the steps in order, you avoid carrying a freshly inked block across your clean paper stack or picking up your baren with inky fingers. Planning the space helps most during longer sessions, when materials start to drift and cleanup gets slower.
Safely Storing and Caring for Your Materials
Dry air, direct sunlight, and rushed storage all wear your tools down faster. Relief carving gear can last years if you stay on top of maintenance.
Here's how we manage ours,
- Wrap blades or keep them in tool rolls so edges don’t dull on hard surfaces
- Shake ink tubs now and then and seal tight gaps with plastic wrap before putting lids back
- Store printing paper flat between crowded books or under clean boards to stop curling
If your workspace gets humid in winter or too warm midsummer, consider boxes or sealable tubs for paper and inks. Bugs and dustflakes do find their way in if things are left uncovered, especially in shared studio nooks or garage rooms.
Don’t leave plates with half-dried ink lying near clean paper. With oil-based inks, even small specks can offset onto stacked sheets.
Building Skills Step by Step in Your Home Setup
A simple space used regularly is better than an elaborate one you barely touch. In the beginning, it's smart to print small and often. Instead of waiting weeks for the perfect design, try,
- Cutting small repeating patterns or test shapes
- Using the same lino block with different inking levels
- Swapping tools one at a time so you can read the difference in each stroke
Once those motions feel normal, printing gets quicker with fewer errors. When your gear lives in the same setup each time, you stop grabbing the wrong thing or mixing the wrong ink amount.
You spot where edges pull too lightly or get blunt fast, and each change you make builds control. Keep those older prints nearby for reference. Knowing what worked gives you a roadmap as your style grows.
Start Strong with a Well-Planned Printing Area
Having a clean, sensible printing setup at home builds good habits early. A table with carving at one end and drying racks at the other sounds simple, but it keeps your progress steady and your materials safer.
We make fewer mistakes when things are laid out clearly. With the right relief printing supplies at hand, tension drops, and each print teaches us something. A smart space doesn’t need to be fancy, just reliable. Over time, that calm setup helps you focus less on the mess and more on getting your marks right.
Setting up a home studio or refining a shared space becomes smoother when you have the right tools nearby. We keep our go-to inks, brayers and carving tools close at hand to stay focused and avoid mid-session scrambling. For those building their kit or replacing worn items, our range of relief printing supplies includes quality options tested by artists who print often. At Art Supplies Castlemaine we understand how much easier printmaking becomes when your setup works the way you do and would be delighted to help you choose the right materials to streamline your layout, so get in touch with us.